Block types, prompt types and defaults
Add your own block and prompt types, and set how far back Recent looks and how blocks are written into a prompt.
These settings are on one pane: click Settings in the sidebar, then Blocks & prompts. They set the types you can pick for blocks and prompts, how far back Recent looks, and how blocks are written into a prompt’s text.
Block types and prompt types
A type says what a block or prompt is for. You pick it in the Type box when you create or edit a block or prompt, and you can filter by it. When a block’s type is included in a prompt, it’s written in the block’s header (see Block header marker).
Each list starts with defaults that can’t be removed:
| List | Defaults |
|---|---|
| Block types | Constraints, Context, Format, Role, Task |
| Prompt types | Skill, System Prompt, User Prompt |
You can add your own types to either list. The defaults are shown first, then your own types, each in A to Z order.
Add a type
-
Click Settings in the sidebar, then Blocks & prompts.
-
Under Types, find Block types or Prompt types and click Add.
-
Type the name of the new type.


-
Press Enter, or click outside the box.
The new type appears in the list, and you can pick it for blocks or prompts straight away.
To stop without adding anything, press Esc. If you leave the box empty, or type a name that’s already in the list, nothing is added. The check matches capital letters exactly: “role” is added as a new type next to “Role”.
Remove a type
Click the X next to a type you added. The defaults have no X.
The type is removed straight away, without asking you to confirm. If you removed one by mistake, add it again with the same name.
Removing a type takes it off the list you pick from. It doesn’t edit any block or prompt that already has that type. If you want those items to use a different type, open each one and choose a new Type.
Days in Recent
Explorer’s Recent tab and the Recent widget on Home show only blocks and prompts changed within this many days. Anything older doesn’t show as Recent, even if it’s the most recent item you have.
Type a number from 1 to 3650 in the box. The default is 30. A number outside that range changes to the nearest allowed number when you leave the box.
See Explorer and The Home screen.
Include the block’s name or type
When you add a block to a prompt on Build, its card has two checkboxes, Include Name and Include Type. When either is ticked, the block gets a header line above its text in the prompt.
These two switches, under When you add a block to a prompt, set how those checkboxes start:
| Setting | When it’s on | Default |
|---|---|---|
| Include the block’s name | New blocks in a prompt start with Include Name ticked. | Off |
| Include the block’s type | New blocks in a prompt start with Include Type ticked. | Off |
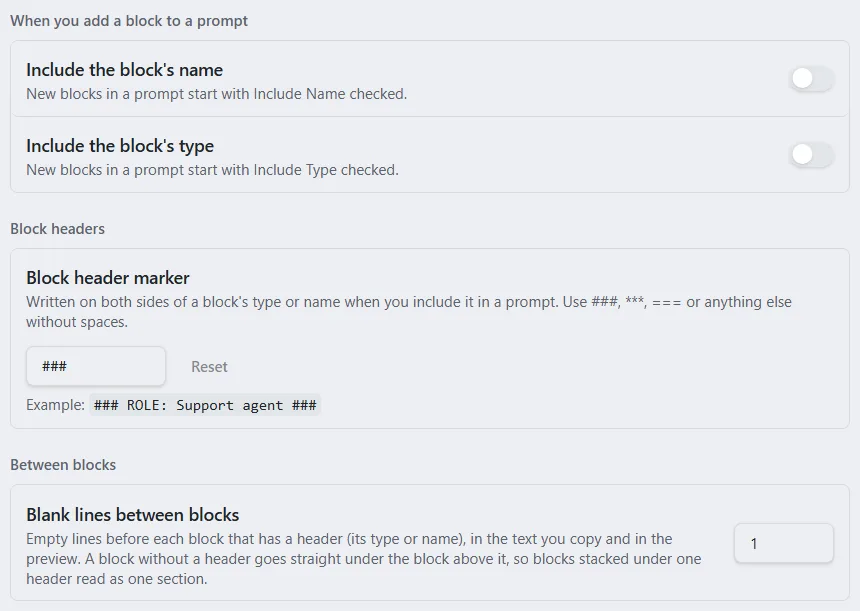
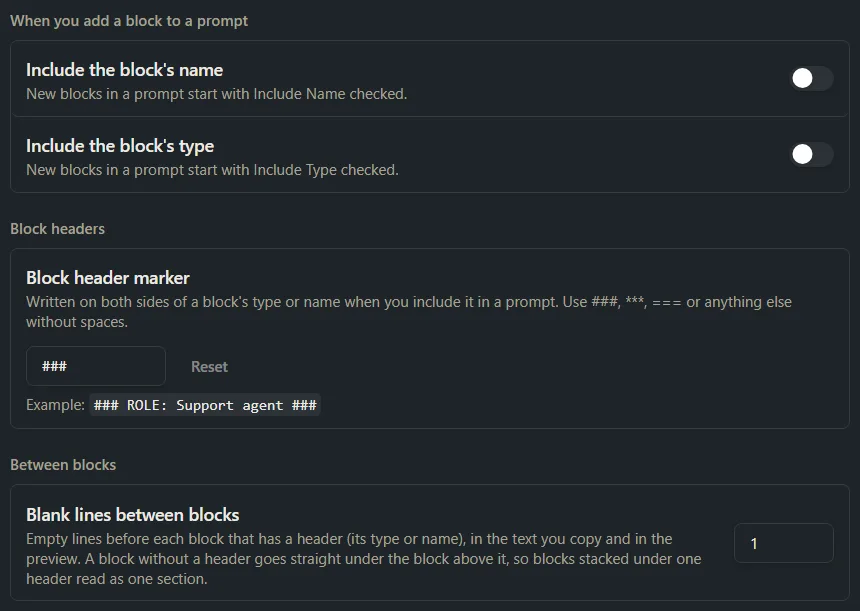
Each block already in a prompt keeps its own choice. Changing these switches doesn’t change any prompt you’ve already built. See Build a prompt.
Block header marker
The marker is written on both sides of a block’s header. With the default marker, ###, headers look like this:
| Included | Header |
|---|---|
| Type only | ### ROLE ### (the type in capital letters) |
| Name only | ### Support agent ### |
| Type and name | ### ROLE: Support agent ### |
A block with neither ticked has no header.
Change the marker
- Click Settings in the sidebar, then Blocks & prompts.
- Under Block headers, click in the Block header marker box and replace
###with the marker you want, for example***or===. - Press Enter, or click outside the box.
The line under the box, Example:, shows a header written with your marker. To go back to ###, click Reset.
The marker is used every time a prompt made of blocks is put together, in the preview and in the text you copy, so it applies to those prompts straight away. A static prompt keeps the text it was saved with. See Static prompts, dynamic prompts and documents.
Marker rules and messages
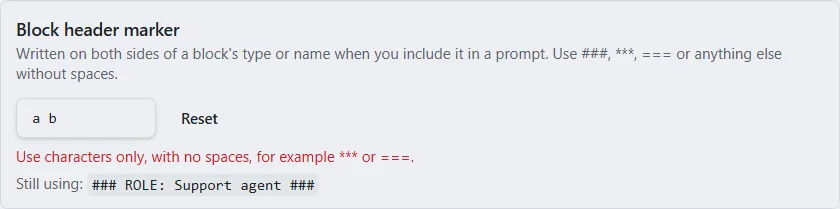
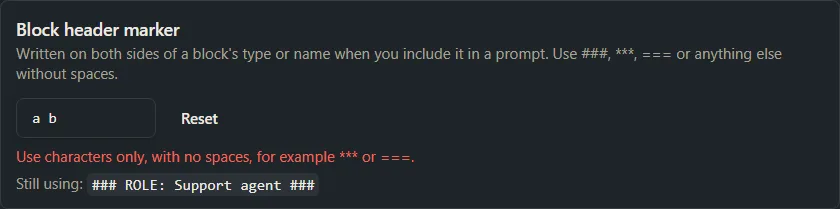
The box takes up to 10 characters. A marker can’t have spaces or use { or }, because prompts use braces for variables. If what you type breaks a rule, a message appears under the box and nothing is saved. The line under the box then reads Still using: followed by a sample header written with the marker that’s still in use.
| Message | What to do |
|---|---|
| Enter a marker, or choose Reset to go back to ###. | The box is empty. Type a marker, or click Reset. |
| Use characters only, with no spaces, for example *** or ===. | Take out the spaces. |
| Leave out { and }, which prompts use for variables. | Take out the braces. |
| Couldn’t save this marker. Try again. | Click in the box and press Enter again. |
Blank lines between blocks
Under Between blocks, Blank lines between blocks sets how many empty lines go before a block that has a header (Include Type or Include Name ticked), in the preview and in the text you copy.
A block with no header continues the section above it, with no blank line between them. The first block in a prompt has nothing before it.
Type 1, 2 or 3. The default is 1. A number outside that range changes to the nearest allowed number when you leave the box.
Like the marker, this applies to prompts made of blocks whenever they’re put together. A static prompt keeps the spacing it was saved with. Extra blank lines inside a block’s text are tidied when the prompt is put together: a run of two or more counts as one, and blank lines at the start and end are dropped.
Want a hand?
Copy this prompt into Claude, ChatGPT or another AI assistant, and it walks you through it step by step.
I want PromptMason to use my own block types and to change how block headers look in my prompts. Walk me through adding a type and changing the header marker.
Copy adds a short note about PromptMason and this guide's steps, so the assistant has what it needs.
I want PromptMason to use my own block types and to change how block headers look in my prompts. Walk me through adding a type and changing the header marker. About PromptMason: a Windows desktop app for building AI prompts from reusable blocks. A person writes blocks (reusable pieces of prompt text), builds prompts from them on the Build screen (or keeps a Markdown document, such as a Skill), and copies a prompt into an AI tool, runs it in PromptMason’s own Chat, or lets a connected AI agent use it through PromptMason’s built-in MCP server (the Chrome extension copies prompts on any website). AI assist, Evaluate and Chat use a local model that runs on the person’s PC, or their own AI provider. The guides are also on PromptMason’s Help screen, and Chat can answer “how do I” questions from them. Libraries hold the blocks and prompts; a person can sync their personal library to their other PCs and share team libraries, both through a folder in cloud storage they already have (OneDrive, Google Drive or Dropbox). Everything synced is encrypted and every edit is signed and checked. A recovery kit (a file plus a code) is the spare copy of the person’s keys, for when every PC is lost. The official guide for this is "Block types, prompt types and defaults": https://promptmason.ai/docs/types-and-defaults Its full text follows, between the lines. Use it as the source of truth, and if anything I see differs from it, tell me rather than guessing. --- These settings are on one pane: click **Settings** in the sidebar, then **Blocks & prompts**. They set the types you can pick for blocks and prompts, how far back Recent looks, and how blocks are written into a prompt's text. ## Block types and prompt types A type says what a block or prompt is for. You pick it in the **Type** box when you create or edit a block or prompt, and you can filter by it. When a block's type is included in a prompt, it's written in the block's header (see [Block header marker](#block-header-marker)). Each list starts with defaults that can't be removed: | List | Defaults | |---|---| | **Block types** | Constraints, Context, Format, Role, Task | | **Prompt types** | Skill, System Prompt, User Prompt | You can add your own types to either list. The defaults are shown first, then your own types, each in A to Z order. ### Add a type 1. Click **Settings** in the sidebar, then **Blocks & prompts**. 2. Under **Types**, find **Block types** or **Prompt types** and click **Add**. 3. Type the name of the new type. 4. Press Enter, or click outside the box. The new type appears in the list, and you can pick it for blocks or prompts straight away. To stop without adding anything, press Esc. If you leave the box empty, or type a name that's already in the list, nothing is added. The check matches capital letters exactly: "role" is added as a new type next to "Role". ### Remove a type Click the **X** next to a type you added. The defaults have no **X**. The type is removed straight away, without asking you to confirm. If you removed one by mistake, add it again with the same name. Removing a type takes it off the list you pick from. It doesn't edit any block or prompt that already has that type. If you want those items to use a different type, open each one and choose a new **Type**. ## Days in Recent Explorer's **Recent** tab and the **Recent** widget on Home show only blocks and prompts changed within this many days. Anything older doesn't show as Recent, even if it's the most recent item you have. Type a number from 1 to 3650 in the box. The default is 30. A number outside that range changes to the nearest allowed number when you leave the box. See [Explorer](https://promptmason.ai/docs/explorer) and [The Home screen](https://promptmason.ai/docs/home). ## Include the block's name or type When you add a block to a prompt on Build, its card has two checkboxes, **Include Name** and **Include Type**. When either is ticked, the block gets a header line above its text in the prompt. These two switches, under **When you add a block to a prompt**, set how those checkboxes start: | Setting | When it's on | Default | |---|---|---| | **Include the block's name** | New blocks in a prompt start with **Include Name** ticked. | Off | | **Include the block's type** | New blocks in a prompt start with **Include Type** ticked. | Off | Each block already in a prompt keeps its own choice. Changing these switches doesn't change any prompt you've already built. See [Build a prompt](https://promptmason.ai/docs/build-prompt). ## Block header marker The marker is written on both sides of a block's header. With the default marker, `###`, headers look like this: | Included | Header | |---|---| | Type only | `### ROLE ###` (the type in capital letters) | | Name only | `### Support agent ###` | | Type and name | `### ROLE: Support agent ###` | A block with neither ticked has no header. ### Change the marker 1. Click **Settings** in the sidebar, then **Blocks & prompts**. 2. Under **Block headers**, click in the **Block header marker** box and replace `###` with the marker you want, for example `***` or `===`. 3. Press Enter, or click outside the box. The line under the box, **Example:**, shows a header written with your marker. To go back to `###`, click **Reset**. The marker is used every time a prompt made of blocks is put together, in the preview and in the text you copy, so it applies to those prompts straight away. A static prompt keeps the text it was saved with. See [Static prompts, dynamic prompts and documents](https://promptmason.ai/docs/static-and-dynamic). ### Marker rules and messages The box takes up to 10 characters. A marker can't have spaces or use `{` or `}`, because prompts use braces for variables. If what you type breaks a rule, a message appears under the box and nothing is saved. The line under the box then reads **Still using:** followed by a sample header written with the marker that's still in use. | Message | What to do | |---|---| | **Enter a marker, or choose Reset to go back to ###.** | The box is empty. Type a marker, or click **Reset**. | | **Use characters only, with no spaces, for example \*\*\* or ===.** | Take out the spaces. | | **Leave out { and }, which prompts use for variables.** | Take out the braces. | | **Couldn't save this marker. Try again.** | Click in the box and press Enter again. | ## Blank lines between blocks Under **Between blocks**, **Blank lines between blocks** sets how many empty lines go before a block that has a header (**Include Type** or **Include Name** ticked), in the preview and in the text you copy. A block with no header continues the section above it, with no blank line between them. The first block in a prompt has nothing before it. Type 1, 2 or 3. The default is 1. A number outside that range changes to the nearest allowed number when you leave the box. Like the marker, this applies to prompts made of blocks whenever they're put together. A static prompt keeps the spacing it was saved with. Extra blank lines inside a block's text are tidied when the prompt is put together: a run of two or more counts as one, and blank lines at the start and end are dropped. --- How to help me: - Go one step at a time. After each step, ask what I see on screen before giving the next one. - Use the exact words on PromptMason’s buttons and screens, as the guide does. - Never ask me for my recovery code, my recovery kit file, a password or my invite line, and never ask me to paste them here. - Start by asking which step I’m on, or what I see now.